
The Ultimate Ergonomic Chair Setup Guide: Optimize Your Posture and Productivity
In today's world, many of us spend countless hours seated, whether working from home, gaming, or simply browsing the internet. What many don't realize is that spending many hours a day in an unergonomic setup can lead to poor posture, discomfort, and even long-term health problems. That's where understanding how to set up your ergonomic chair correctly comes in. Think of your chair like a trusty steed for your daily journeys – but instead of open plains, you're navigating spreadsheets and emails. A well-adjusted ergonomic setup can be your secret weapon. This comprehensive guide will walk you through the ins and outs of ergonomic chair setup, helping you optimize your posture, boost productivity, and minimize discomfort.
Why is an Ergonomic Chair Setup Important?
Before diving into the specifics, let's address the core question: why bother with an ergonomic chair setup in the first place? The answer boils down to the numerous benefits it offers for your physical and mental well-being.
- Improved Posture: A properly adjusted ergonomic chair supports the natural curves of your spine, promoting good posture and reducing the risk of slouching or hunching.
- Reduced Pain and Discomfort: By providing adequate support and cushioning, an ergonomic chair can alleviate pressure points and minimize pain in your back, neck, shoulders, and hips.
- Increased Productivity: When you're comfortable and pain-free, you can focus better on your tasks, leading to increased productivity and efficiency.
- Prevention of Long-Term Health Issues: Consistent use of an ergonomic chair can help prevent or manage chronic conditions such as carpal tunnel syndrome, sciatica, and spinal degeneration.
- Enhanced Circulation: Proper chair adjustments can encourage healthy blood flow, reducing fatigue and stiffness.
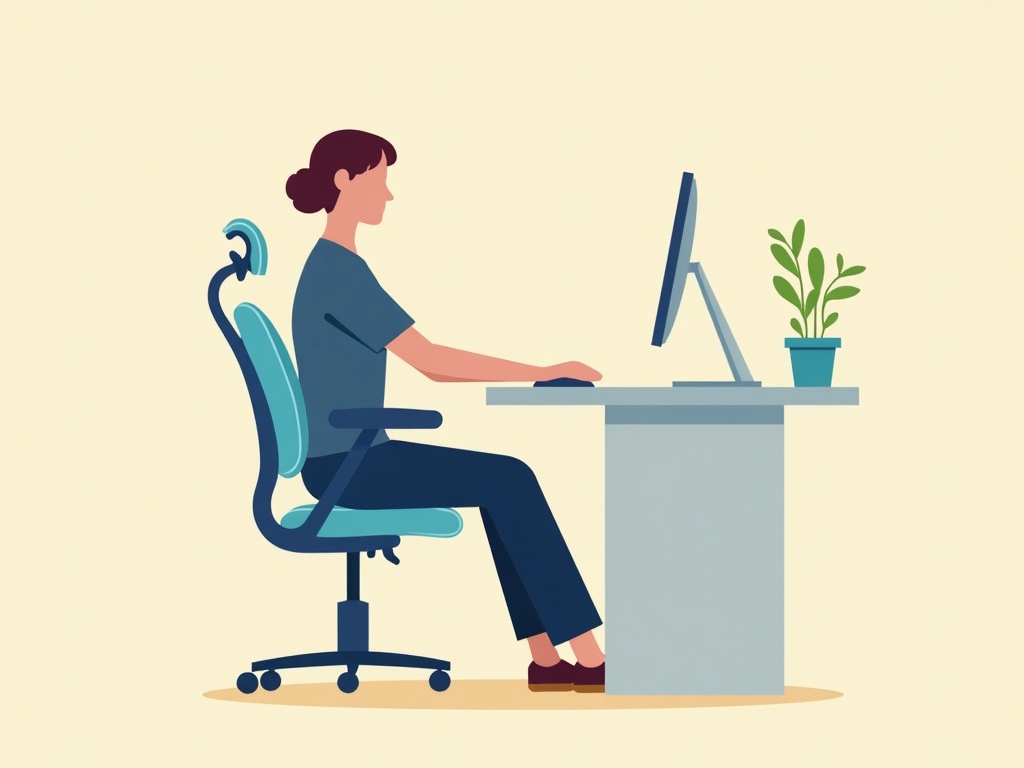
Key Components of an Ergonomic Chair
To effectively set up your ergonomic chair, it's essential to understand its various components and how they contribute to overall comfort and support. Here's an overview:
- Seat Height: Adjusts the height of the seat to ensure your feet are flat on the floor and your knees are at a 90-degree angle.
- Seat Depth: Controls the depth of the seat, allowing you to adjust the distance between the back of your knees and the seat edge.
- Backrest Height: Positions the backrest to support the natural curvature of your spine, particularly the lumbar region.
- Backrest Angle: Adjusts the angle of the backrest to provide optimal support and comfort, whether you're sitting upright or reclining slightly.
- Lumbar Support: Offers targeted support to the lower back, helping to maintain proper spinal alignment.
- Armrests: Support your arms and shoulders, reducing strain and preventing fatigue.
- Headrest: Provides support for your head and neck, promoting relaxation and reducing tension.
- Tilt Tension: Controls the amount of resistance when you lean back in your chair.
- Swivel Base: Allows you to easily rotate and reach different areas of your workspace without straining your body.
Step-by-Step Ergonomic Chair Setup Guide
Now that you're familiar with the key components of an ergonomic chair, let's move on to the step-by-step setup process. Follow these instructions to ensure your chair is properly adjusted for optimal comfort and support.
Step 1: Adjust Seat Height
Start by adjusting the seat height so that your feet are resting flat on the floor or on a footrest. Your knees should be bent at a 90-degree angle, with your thighs parallel to the floor. If your feet are dangling or you have to strain to reach the floor, lower the seat. Conversely, if your knees are above your hips, raise the seat.
Step 2: Adjust Seat Depth
Next, adjust the seat depth to ensure there's a gap of about two to four inches between the back of your knees and the edge of the seat. This prevents pressure on your legs and promotes healthy circulation. If the seat is too deep, your lower back won't receive adequate support from the backrest. If it's too shallow, your thighs won't be properly supported.
Step 3: Adjust Backrest Height
Adjust the backrest height so that the lumbar support aligns with the natural curve of your lower back. The lumbar support should gently push your lower back forward, maintaining the spine's natural S shape. This helps prevent slouching and reduces strain on your back muscles. If your chair doesn't have adjustable lumbar support, consider using a separate lumbar cushion.
Step 4: Adjust Backrest Angle
Adjust the backrest angle to find a comfortable and supportive position. Most ergonomic chairs allow you to lock the backrest in an upright position or allow it to recline freely. Experiment with different angles to find what feels best for you. Ideally, you should be able to sit upright without straining your back, while also being able to recline slightly for relaxation.
Step 5: Adjust Armrests
Adjust the armrests so that your arms are supported without causing your shoulders to hunch or strain. Your elbows should be bent at a 90-degree angle, and your forearms should rest comfortably on the armrests. If your armrests are too high, they can cause shoulder tension. If they're too low, they can lead to slouching.
Step 6: Adjust Headrest (If Applicable)
If your chair has a headrest, adjust it so that it supports the natural curve of your neck. The headrest should gently cradle your head, providing support and reducing tension in your neck and shoulders. Avoid tilting your head back too far or pushing it forward.
Step 7: Adjust Tilt Tension
Adjust the tilt tension to control the amount of resistance when you lean back in your chair. If you prefer a more rigid feel, increase the tension. If you want to be able to recline more easily, decrease the tension. Experiment with different settings to find what feels most comfortable and supportive for you.
Fine-Tuning Your Ergonomic Setup
Adjusting your ergonomic chair is just the first step. Fine-tuning your overall workstation setup is equally important for maximizing comfort and productivity. Consider the following tips:
- Monitor Placement: Position your monitor at arm's length and at eye level. This prevents neck strain and promotes good posture. If you're using multiple monitors, arrange them so that you can easily view them without twisting your neck.
- Keyboard and Mouse Placement: Place your keyboard and mouse close to your body, with your elbows bent at a 90-degree angle. This reduces strain on your wrists and arms. Consider using an ergonomic keyboard and mouse to further enhance comfort.
- Footrest: If your feet don't reach the floor comfortably, use a footrest to provide support and promote proper circulation.
- Lighting: Ensure your workspace is well-lit to prevent eye strain. Position your light sources to minimize glare on your monitor.
- Breaks and Stretching: Take regular breaks to stand up, stretch, and move around. This helps prevent stiffness and fatigue.
Common Ergonomic Mistakes to Avoid
Even with a properly adjusted ergonomic chair, it's easy to fall into common ergonomic pitfalls. Be mindful of the following mistakes and take steps to correct them:
- Slouching: Consciously maintain good posture throughout the day. Sit up straight, with your shoulders relaxed and your back supported by the backrest.
- Leaning Forward: Avoid leaning forward towards your monitor, as this can strain your neck and back. Adjust your monitor position to eliminate the need to lean.
- Ignoring Pain Signals: Pay attention to any discomfort or pain you experience while sitting. If you notice persistent pain, consult with a healthcare professional or an ergonomics specialist.
- Static Positions: Avoid staying in the same position for extended periods. Change your posture frequently, and take breaks to move around.
- Relying Solely on the Chair: An ergonomic chair is just one component of a healthy workstation setup. Don't neglect other important factors such as monitor placement, keyboard and mouse position, and lighting.
Maintaining Your Ergonomic Chair
To ensure your ergonomic chair continues to provide optimal support and comfort, it's essential to maintain it properly. Here are a few tips:
- Regular Cleaning: Clean your chair regularly to remove dust, dirt, and grime. Use a mild detergent and a soft cloth to wipe down the surfaces.
- Lubrication: Lubricate moving parts as needed to keep them functioning smoothly. Use a silicone-based lubricant for best results.
- Tightening: Periodically check and tighten any loose screws or bolts to prevent wobbling or instability.
- Professional Inspection: Consider having your ergonomic chair professionally inspected and serviced every few years to ensure it's in good working condition.
Investing in Your Well-being
Setting up your ergonomic chair correctly is an investment in your long-term health and well-being. By following the tips and guidelines outlined in this guide, you can create a comfortable and supportive workspace that promotes good posture, reduces pain, and enhances productivity. Remember, ergonomics is not a one-size-fits-all solution. Experiment with different adjustments and configurations to find what works best for your individual needs and preferences.
Take the time to fine-tune your setup, and you'll reap the rewards of a healthier, happier, and more productive work life.